
If you want to start crocheting in the round without leaving a hole in the center, the magic ring (also called magic circle) is the technique you need.
It creates a tight, clean start for projects like hats, amigurumi, coasters, and flowers. This guide breaks everything down into clear, simple steps so beginners can follow along with confidence.
What Is a Magic Ring (Magic Circle)?
A magic ring is a crochet technique that lets you start your project with an adjustable loop instead of a chain circle. You crochet your first stitches into this loop and then pull the tail to close the center completely.
This stops the small hole that often appears in the middle of projects started with traditional chains. It’s especially useful for amigurumi, round motifs, and anything that needs a neat, tight center.
What You’ll Need
- Any yarn (medium-weight yarn is easiest for beginners)
- A matching crochet hook size
- Scissors
- A yarn needle for weaving in the tail
Tension tip: Keep the yarn tail long about 4–6 inches o you can pull the ring closed easily.
Step-by-Step Photo Tutorial
Make the Loop
Wrap the yarn around your fingers to create a circle, crossing the working yarn over the tail. Hold the point where the yarn crosses to keep the loop steady. This circle will become the base of your magic ring.
Insert Hook and Pull Up Loop
Slide your hook under the loop and grab the working yarn. Pull it through the circle to create your first working loop. This anchors the ring so it doesn’t fall apart as you continue.
Chain if Needed / Trap Tail
Make one chain if your stitch type requires it (for example, single crochet usually needs one chain to begin). As you chain, make sure the yarn tail is trapped between your fingers so the ring stays open while you work into it.
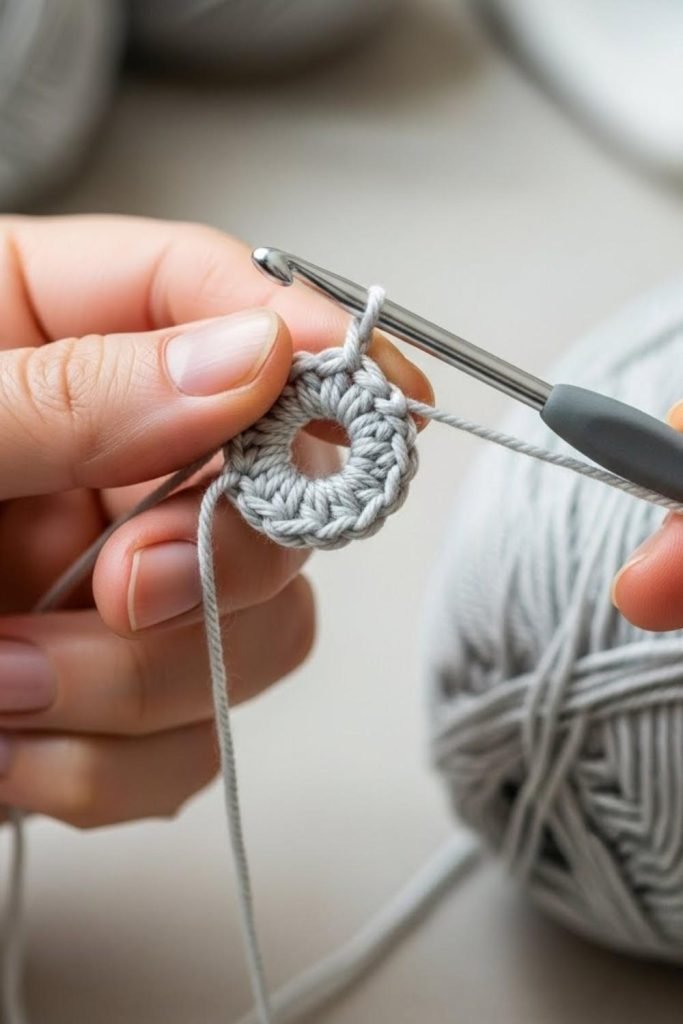
Work Stitches Into the Ring
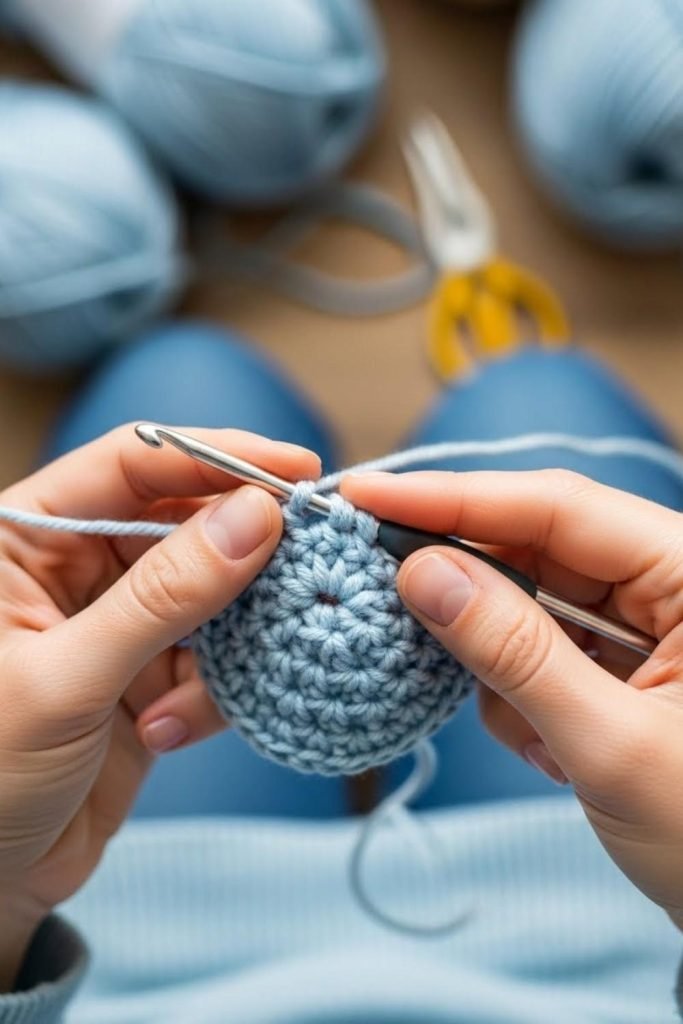
Crochet the required number of stitches directly into the center of the loop. Keep the stitches relaxed so the ring doesn’t tighten too early. All your first round stitches will sit around this adjustable circle.
Pull the Tail to Close and Weave In Ends
Once you have all your stitches inside the ring, gently pull the yarn tail until the center closes tightly. Use a yarn needle to weave the tail into the back of your stitches so it stays secure.
Common Variations
- Single-wrap magic ring: One loop around your fingers; easy and quick for most projects.
- Double-wrap magic ring: Two loops around your fingers; helpful for slippery yarns or extra-secure centers.
- Chain vs no-chain starts:
- For single crochet, most people chain one.
- For taller stitches like double crochet, chain two or three if needed.
- Some crocheters skip chains for a tighter start.
Mistakes Beginners Make
- Ring slips open: Make sure you pull the yarn tail firmly after finishing your first round.
- Stitches not counted correctly: Count your stitches before closing the ring so you don’t have to reopen it.
- Ring too tight: Loosen your tension while working the first round so the ring can close smoothly.
- Ring too loose: Pull the tail again after round one to make the center tighter.
- Yarn twists: Keep your fingers steady while wrapping the loop to prevent crossing strands.
Practice Patterns (Mini Projects)
Try these small beginner-friendly ideas to practice your magic ring:
- Simple amigurumi ball
- Basic coaster
- Crochet flower
- Mini face scrubby
- Small basket base
These projects only need a few rounds, so they’re perfect for practicing your ring and first stitches.
Conclusion
The magic ring is one of the most useful crochet skills for working in the round. Once you learn how to make the loop, secure it, and close it tightly, your projects will look cleaner and more polished. With a little practice, this technique becomes quick, easy, and natural.