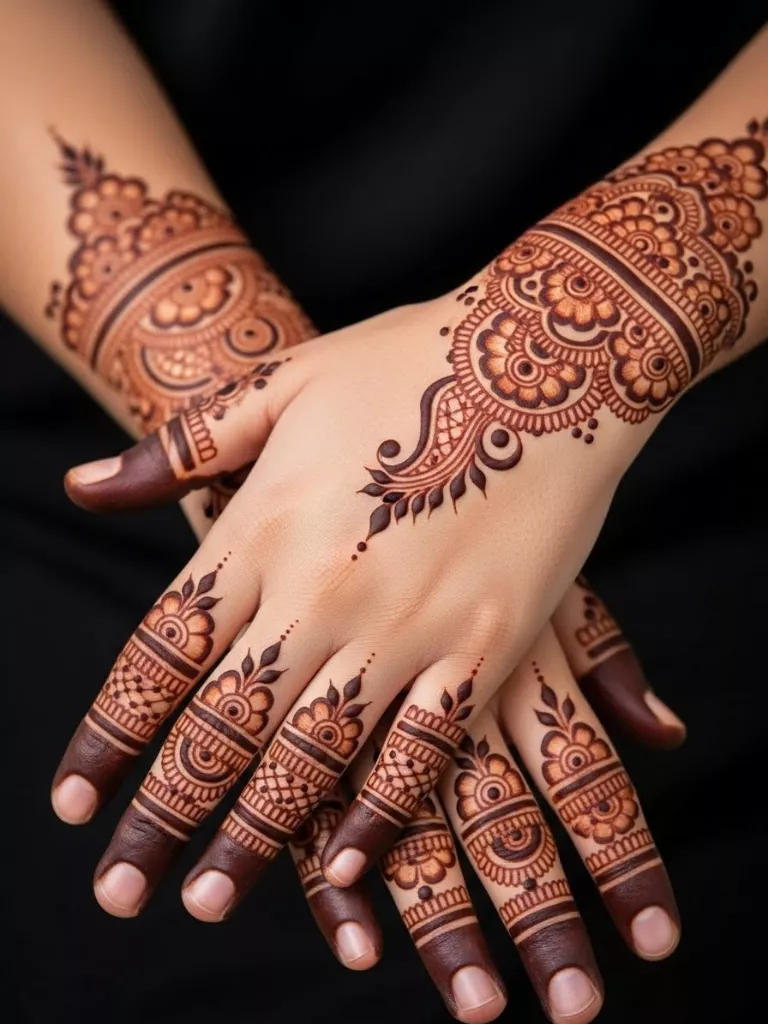
A good back hand mehndi design makes your hands look pretty without being hard to draw. Many people want something simple, quick, and stylish, especially for photos or last-minute events.
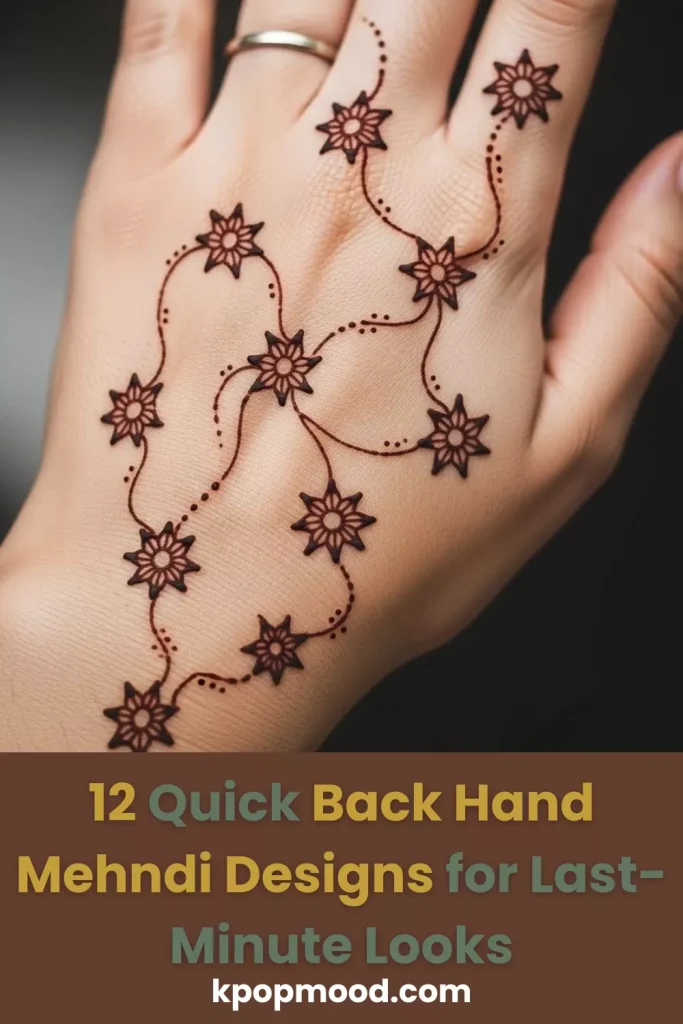
These ideas keep things easy and practical so anyone can try them. You don’t need special tools or expensive mehndi cones. Just steady hands, simple shapes, and a little patience.
1. Minimal Leaf Trail
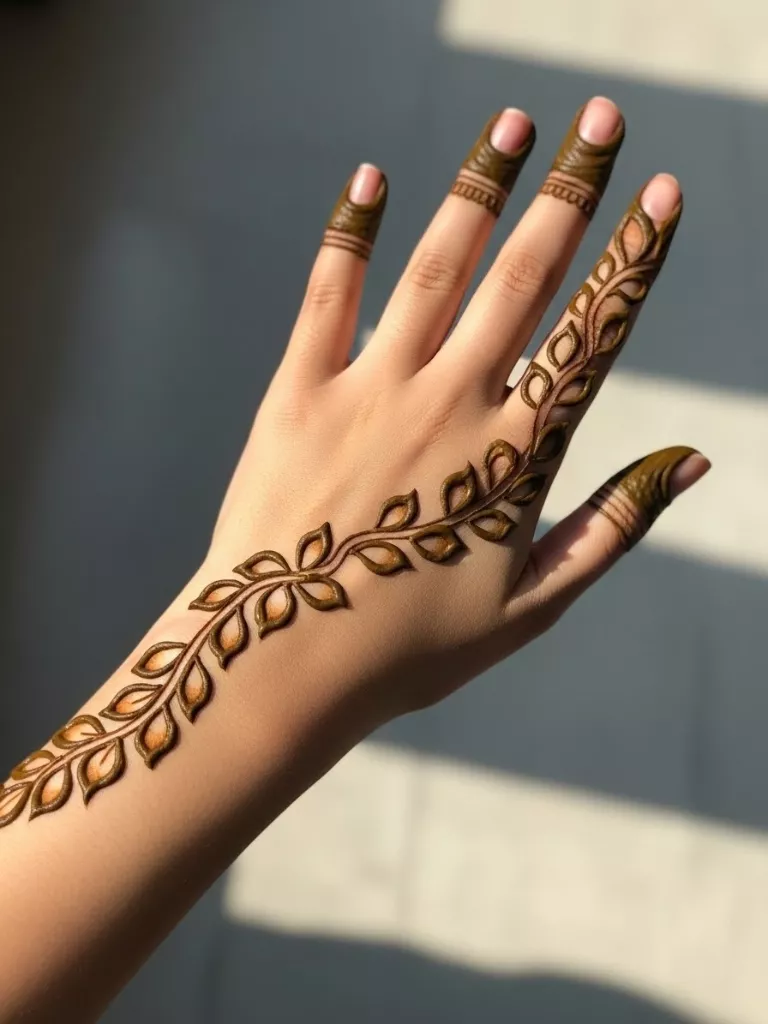
A leaf trail is one of the easiest designs to start with. It follows a simple curved line, which makes it great for beginners who want something that looks clean.
Begin with a thin vine, then place small leaves on both sides. Keep the leaves narrow so the design stays neat. This works well for simple outings or last-minute prep before a function.
If you want to add a little extra, place a few dots near the wrist or between the leaves. You don’t need much henna, which keeps it budget-friendly.
Practice drawing the curve on paper first so your final result looks smooth and steady. It’s a light design that still looks lovely in photos.
2. Bold Mandala Circle
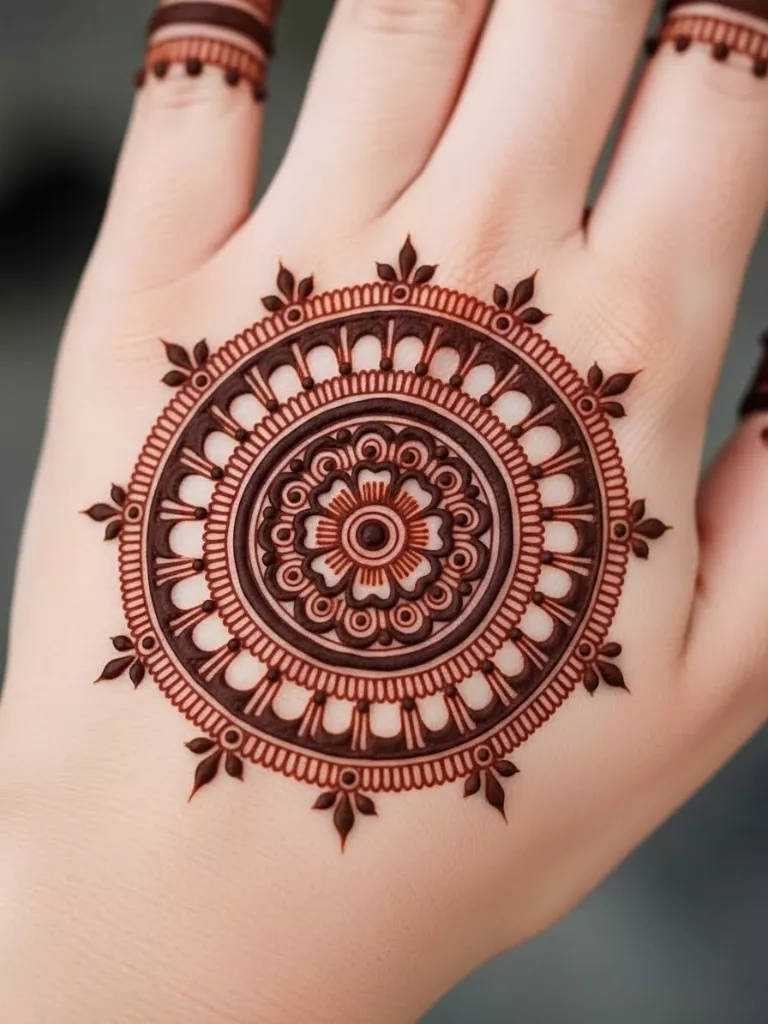
A mandala circle makes the hand look balanced without too much effort. Start with a tiny dot, then slowly build outwards with thin rings. Add light patterns like petals, small curves, and dots to keep it pretty but not heavy.
This design works well for festivals, weddings, or even simple gatherings because it suits all outfits. If you struggle with round shapes, rest your elbow on a stable table so your hand doesn’t shake.
The best part is you can stop at any ring if you feel it’s enough. It uses very little henna and gives a clean, finished look. Pair it with bangles or a simple bracelet for a nice touch. The mandala photographs very well because of its symmetry.
3. Delicate Bracelet Style
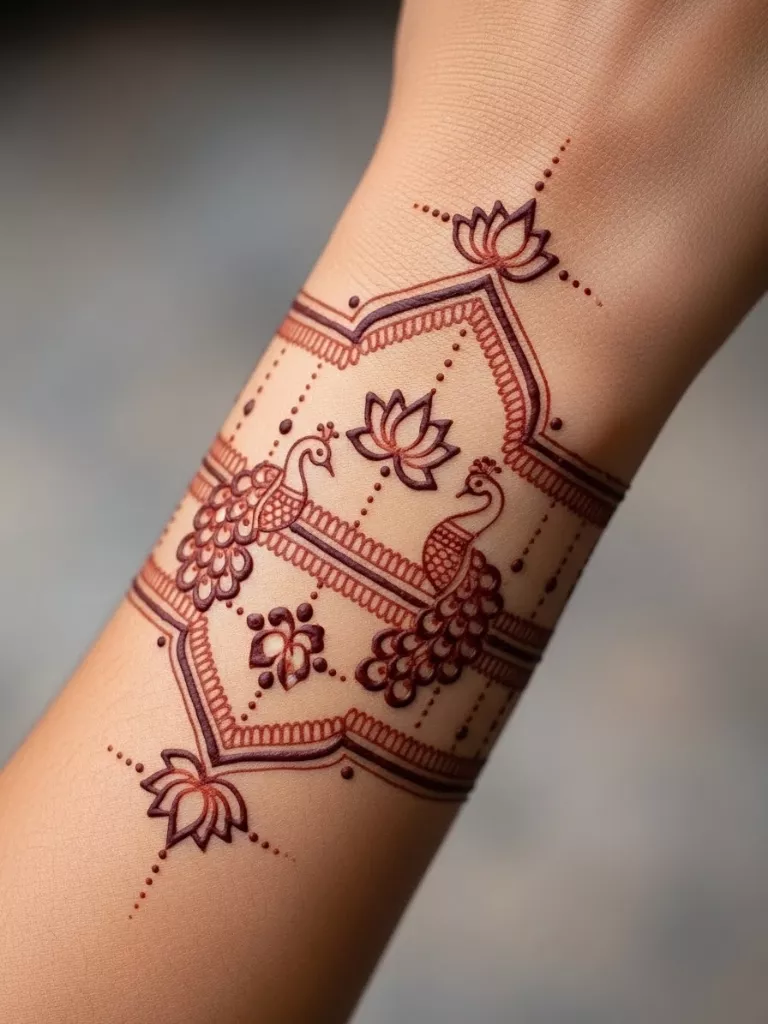
A bracelet-style mehndi design gives a soft, elegant look without covering the whole hand. Draw a thin band across the wrist, then add charm-like dots, mini flowers, or curved links above or below it.
This design is great for people who like light patterns or want something quick before stepping out. You can add a small trail from the bracelet toward the back of the hand if you want just a little more detail.
It’s very budget-friendly because you only use a small amount of henna. This style pairs well with real jewelry since it looks like an extension of your accessories. If you want a cleaner finish, use a fine-tip cone for the lines.
4. Classic Finger Tips
Finger-tip mehndi designs are quick and stylish. They keep most of the hand bare, which makes the small patterns stand out more.
Fill each fingertip with solid color, then add tiny shapes like dots, mini leaves, triangles, or curved lines near the knuckles. This style works especially well for casual days, school events, or quick family gatherings.
Since the fingers are small areas, you don’t have to worry about big shapes or perfect symmetry. It’s great for beginners because the patterns are short and easy.
You also save henna since you’re decorating only the fingers. Add a ring or two to highlight the design even more.
5. Rose Vine Pattern
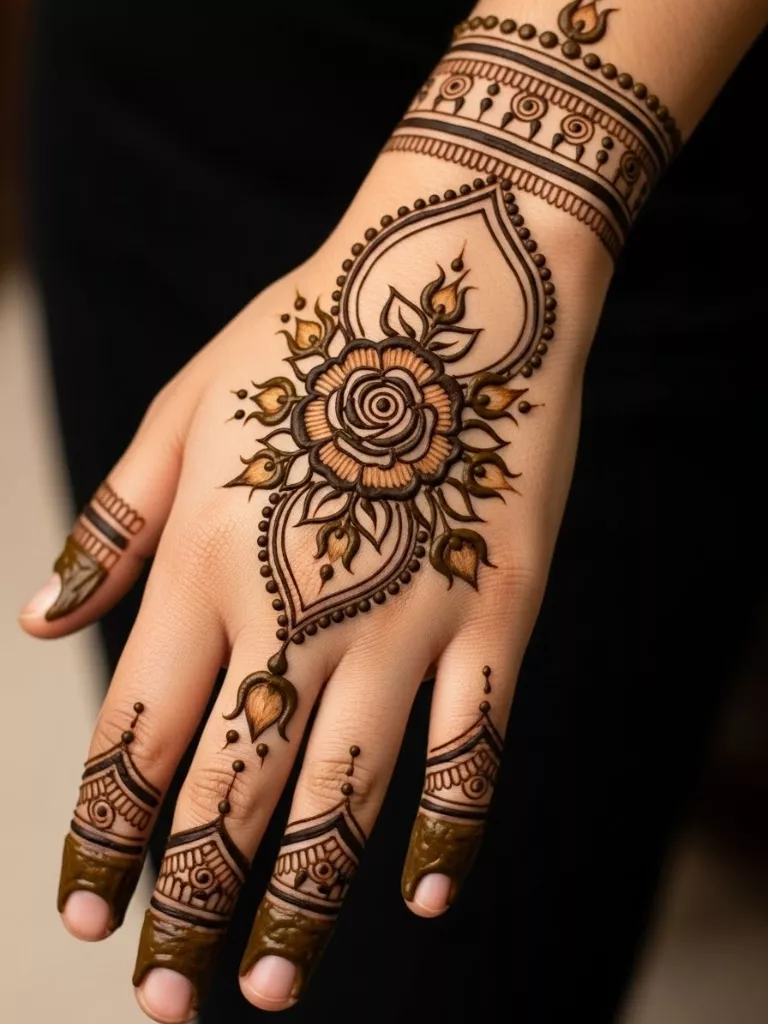
A rose vine design is pretty and soft. Start with a simple rose near the wrist just swirl small circles inside each other to form petals.
Then stretch a curved vine toward a finger, adding leaves and tiny buds along the way. Keep the rose clear by avoiding too much shading.
This style works well for special events because it looks delicate without being complicated. If you want extra detail, place a few small dots around the vine.
You can even add a second small rose near the finger for balance. Sketching a light guide on your skin with a washable marker helps if you’re new to drawing curves.
6. Grid and Petal Mix
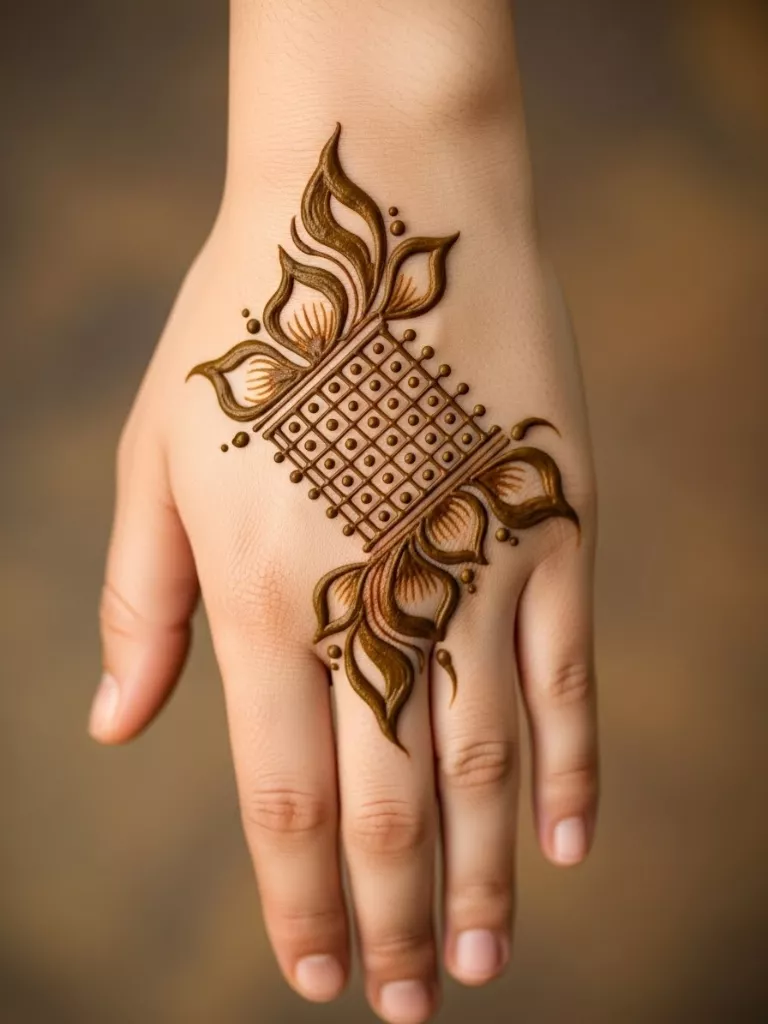
This design looks detailed even though the steps are simple. Draw a tiny box-style grid near the center of the hand, then add a ring of petals around it.
The mix of straight lines and soft curves makes the hand look neat. Keep the grid small so the whole design stays easy to handle. It works well for all hand sizes because you can adjust the number of petals.
If the design feels too empty, add dots or small curves between petals. This idea is good for family functions or casual parties. You don’t need advanced skills just patience with the lines.
7. Peacock Feather Touch
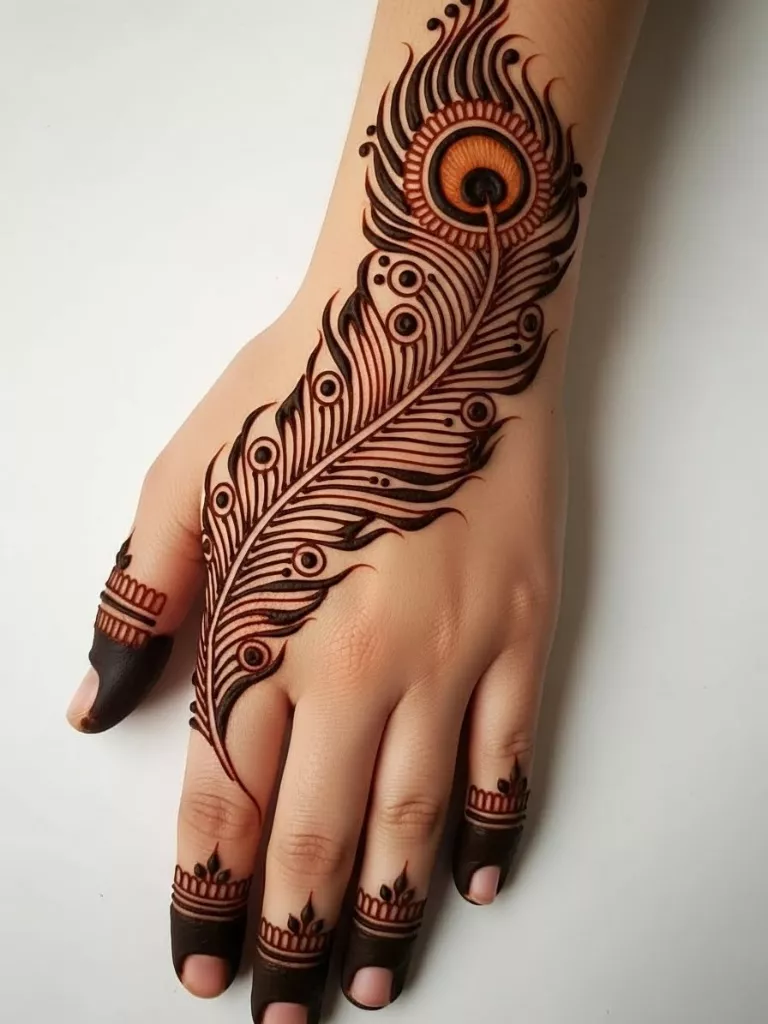
A peacock feather gives the hand a graceful look. Start with a long thin stem, then build the feather shape with curved strokes. Add the inner “eye” by drawing a small oval inside a larger one.
Keep the lines soft so the feather looks airy. This design works well if you prefer long shapes instead of round ones. It also pairs nicely with rings.
If you’re doing it yourself, draw the feather lightly on your hand with a removable marker to guide your strokes. You can keep it simple or add tiny lines inside the feather for extra detail. It takes little time and suits any occasion.
8. Paisley Pair Design
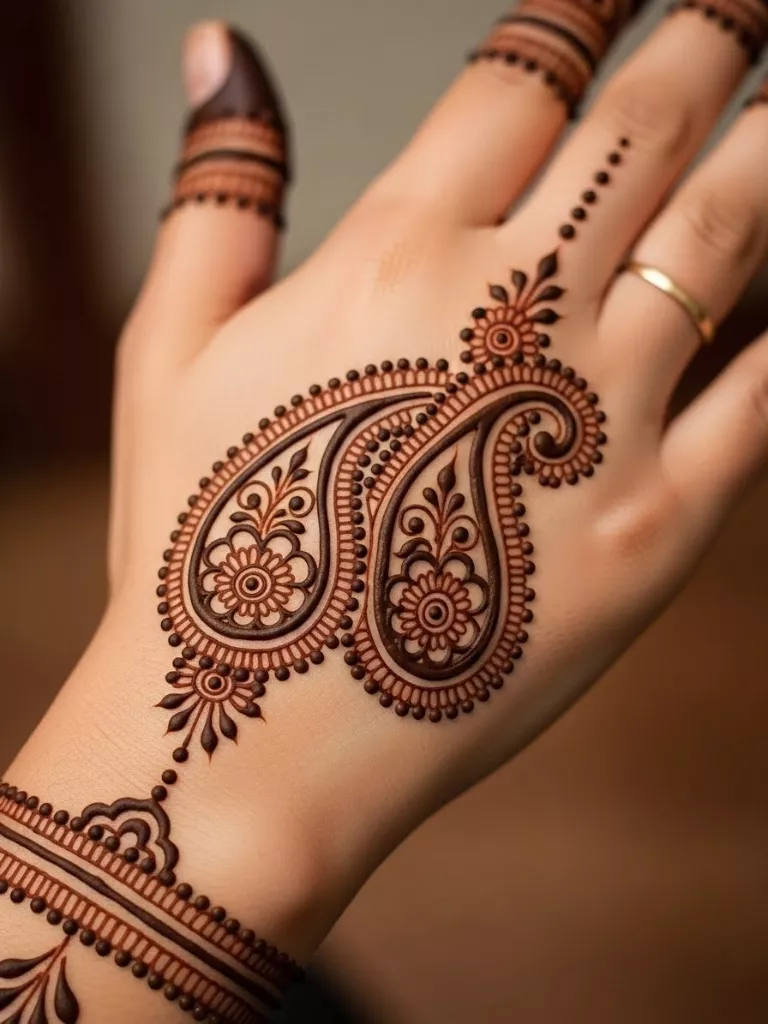
Paisley designs are classic and look beautiful on any hand. Draw two medium-sized paisleys touching each other, then fill them with tiny lines, dots, or curved shapes.
You can extend a small trail toward the middle finger for an extra touch. This idea is perfect when you want something fuller but still easy to draw.
The shape is forgiving, so beginners can handle it well. Add a few dots around the paisleys to frame the pattern. If you want it darker, apply thicker lines inside the paisley. It looks good in photos and pairs well with traditional outfits.
9. Star Cluster Mehndi
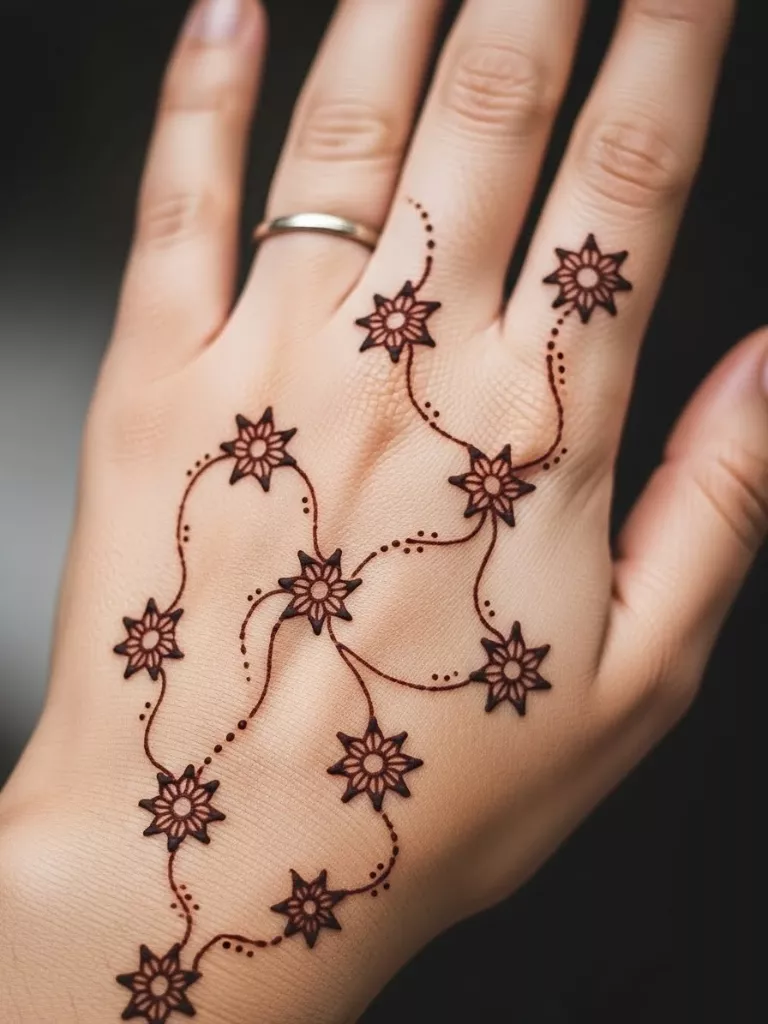
A star cluster gives the hand a fun, playful look. Draw tiny stars across the top of the hand, then use light curved lines to connect a few of them. Keep most stars small so the design doesn’t feel heavy.
This design is great for kids, teens, or anyone who wants something cheerful and simple. You can finish it with dots for a sparkling effect. It’s one of the easiest designs since each star is only a few strokes.
You also use very little henna, making it budget-friendly. It works well for school fairs, birthdays, or casual meetups. If you want a more filled look, add a slightly larger star near the center.
10. Half-Hand Floral Arc
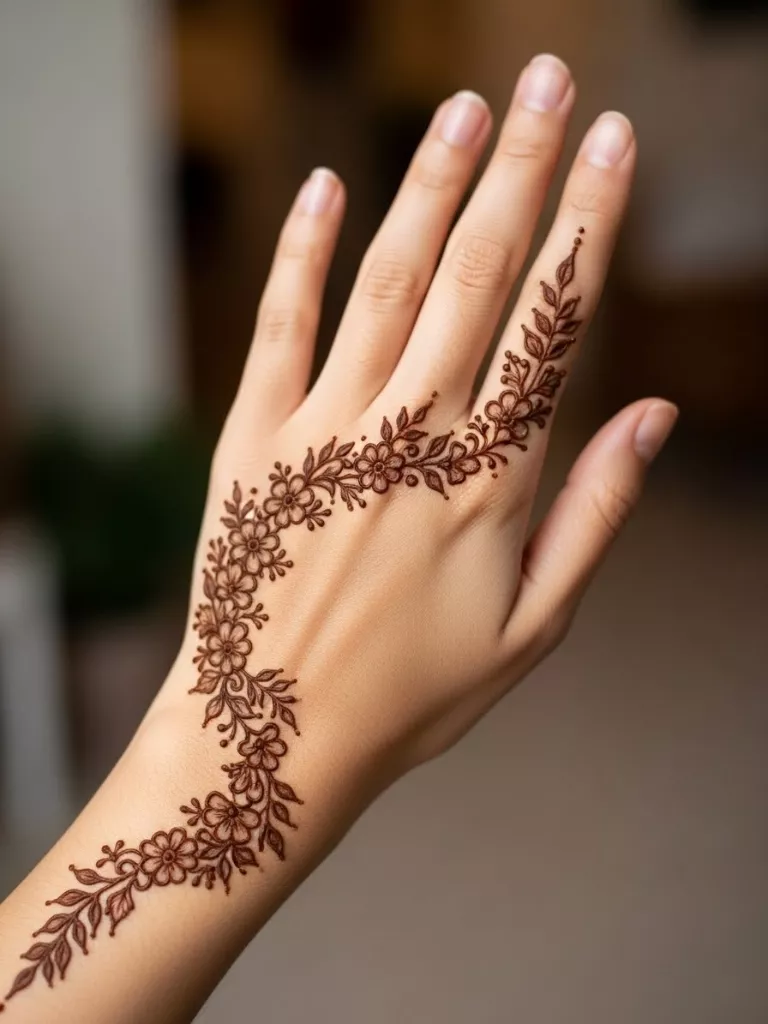
A floral arc is soft and eye-catching. Start from the side of the hand and build a curve of flowers going upward. Add leaves in open spaces to keep it balanced.
Keep spacing wide so the design stays light and easy to follow. This works for adults, teens, and kids because the shapes are simple. It also pairs well with everyday outfits.
You can add a few dots along the arc for extra charm. If you want a slightly stronger effect, shade one side of each flower. The arc shape makes the hand look longer and elegant without much effort.
11. Mesh Finger Web

A mesh finger design looks stylish without covering the whole hand. Draw mini diamonds across the fingers to form a web-like pattern. Add dots along the edges to complete the look.
This idea is perfect if you want your fingers to stand out more than the rest of your hand. It pairs nicely with rings and nail art. Since each diamond is small, you don’t need a steady hand for long lines.
It also uses very little henna, making it budget-friendly. You can keep the rest of the hand bare or add a small dot pattern near the wrist if you want a tiny extra touch.
12. Festival Full Spread

A full spread gives a complete festive look without needing complicated shapes. Start with a big flower in the center, then build around it using simple lines, dots, and leaf clusters.
Keep each section small so you don’t get overwhelmed. This design is great for weddings, holidays, and big celebrations. Beginners can handle it because it uses very basic shapes repeated across the hand.
You can skip any area if it feels too much. It photographs beautifully since it fills the hand evenly. Apply the paste thicker to get a darker stain for the event.
Conclusion
Back hand mehndi doesn’t have to be difficult or time-consuming. These designs help you decorate your hands with patterns that look stylish without stressing over details.
Each idea is easy to practice, budget-friendly, and perfect for everyday or special events. Choose one that suits your style and start with small strokes to build confidence.
With a little patience, your hands will look beautifully designed every time.