If you want to make a useful crochet project that looks stylish and doesn’t require expert skills, a crochet bag is the perfect choice.
This beginner-friendly guide walks you through the entire process from choosing yarn to adding straps and lining. By the end, you’ll have a sturdy, handmade bag you can use every day.
Quick Overview
This blog teaches you how to make a simple crochet tote-style bag from the base up. It is beginner-friendly, uses basic stitches, and works up faster than you might think.
The finished size is approximately 12 inches wide and 13 inches tall, but you can easily adjust the height or add longer straps if you want a shoulder bag.
Materials & Tools
| Item | Details / Recommendations |
|---|---|
| Yarn | 100% cotton, macramé cord, or raffia yarn for durability. Medium weight (4) or bulky (5) works best. |
| Recommended yarn brands | Lily Sugar’n Cream (cotton), Lion Brand 24/7 Cotton, Bernat Maker Home Dec (bulky cord). |
| Hook size | 4.0 mm–5.5 mm for medium weight; 6.0 mm–8.0 mm for bulky cord. |
| Notions | Stitch markers, tapestry needle, scissors. |
| Optional lining | Cotton fabric for lining, zipper, sewing needle or sewing machine. |
| Interfacing (optional) | Medium-weight interfacing for extra structure. |
Skills Used
- Chain stitch (ch)
- Single crochet (sc)
- Half double crochet (hdc)
- Double crochet (dc)
- Slip stitch (sl st)
- Increasing in the round
- Changing colors (optional)
Step 1: Make the Base
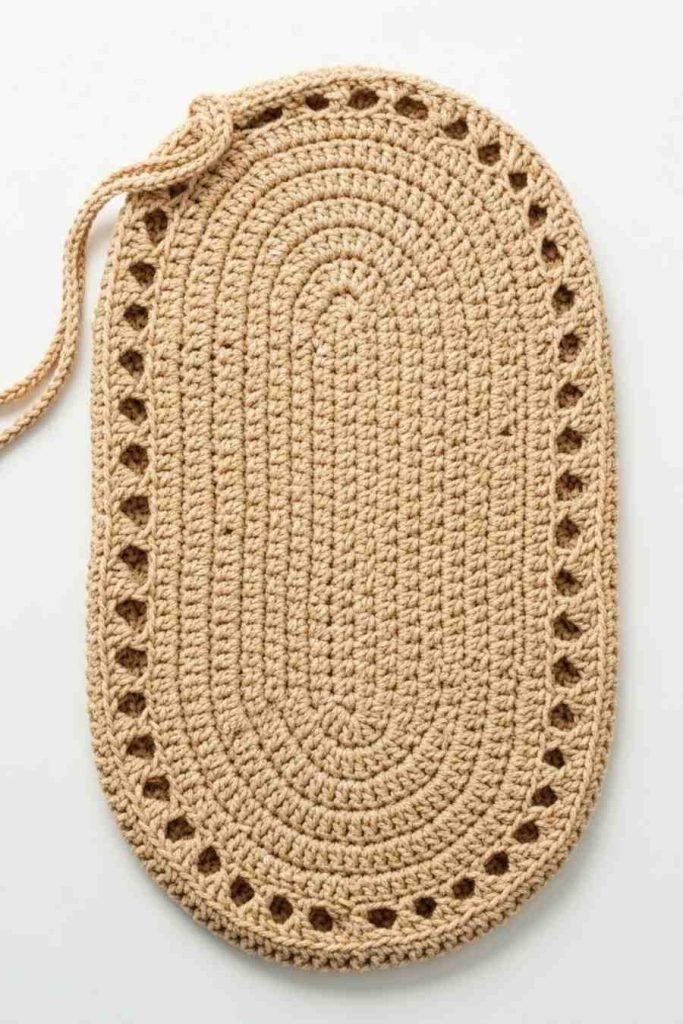
To make the base, start by creating a slipknot and chaining 21, or more if you want a wider bag. Work single crochet stitches into the second chain from the hook and continue across the entire row.
When you reach the last chain, place three single crochet stitches into that same stitch to smoothly turn the corner.
Then continue working single crochets along the opposite side of the chain to complete the oval shape. Once you reach the starting point, slip stitch to join the round and finish the base foundation.
Gauge Tip: For a sturdy base, keep your tension slightly tight. If the base curls, your hook size may be too small; if it feels loose or floppy, switch to a smaller hook.
Increase for a larger base:
Every round, add increases at both ends of the base (usually the 3-stitch corner area). Continue until your base reaches your desired shape oval or rectangular.
Step 2: Work the Body
Once your base reaches the size you want, begin working the body of the bag by making a round of half double crochet (hdc) around the entire edge without increasing.
This forms the first row of the bag’s walls and starts building height. Continue crocheting in the round for about 20–30 rounds, depending on how tall you want your bag to be.
You can keep the texture simple or add interest by switching between single crochet (sc), half double crochet (hdc), or even a basic mesh pattern.
If you want to change colors, do so at the end of a round by pulling the new color through the final loop of the previous stitch for a clean, neat transition.
Height Options:
- Short handbag: 18–20 rounds
- Medium tote: 24–28 rounds
- Tall shoulder bag: 30+ rounds
Step 3: Shape the Top / Finish Edges
To shape the top of your crochet bag and give it a clean, polished finish, work one to two rounds of single crochet evenly around the entire upper edge.
Keep your tension steady as you stitch to prevent the edge from flaring outward or becoming uneven.
If you want a more structured look, you can add a final round of slip stitches, which creates a firmer, tighter edge that helps the bag hold its shape.
Edge Style Options:
- Simple single crochet edge
- Slip stitch ribbed edge
- Decorative scallop edge (dc + sc patterns)
Step 4: Add Straps
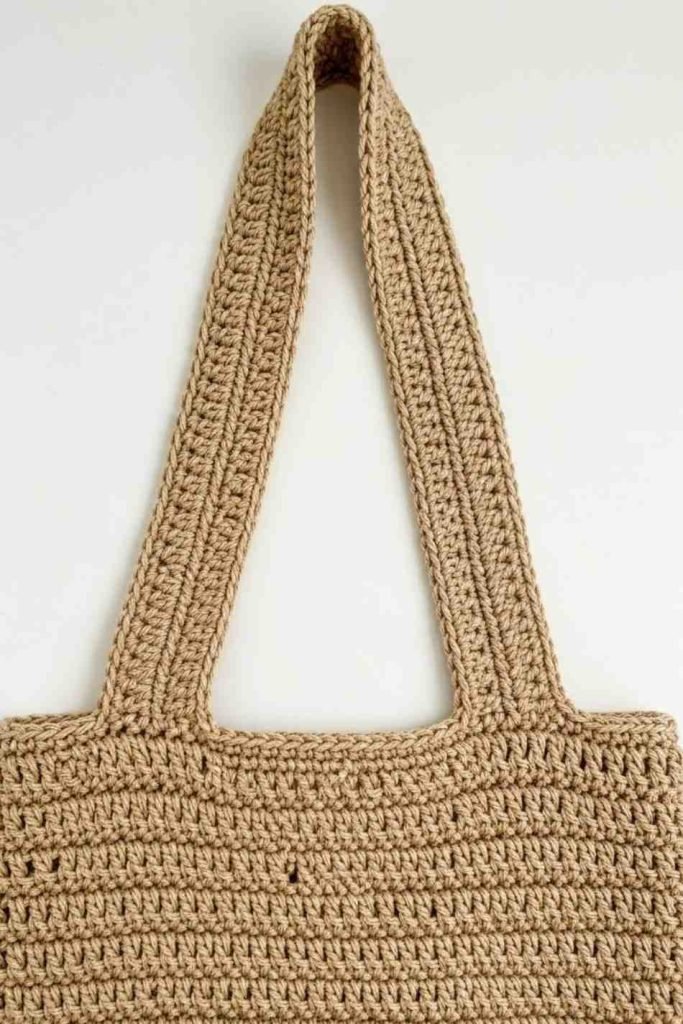
There are two easy strap options: single strap (crossbody) or double straps (tote).
How to Make the Straps
To make the straps, begin by chaining 70–90 stitches for long straps or 40–50 stitches for shorter handles. Then work a row of single crochet (sc) or half double crochet (hdc) back across the entire chain.
If you want thicker, sturdier straps, simply repeat this for 2–3 total rows. Once finished, attach the straps firmly by sewing or slip-stitching them to the inside of the bag, making sure both sides sit evenly so the bag hangs straight.
Recommended Strap Lengths
| Strap Style | Length |
|---|---|
| Short handle | 12–14 in |
| Shoulder strap | 22–26 in |
| Crossbody strap | 35–45 in |
Step 5: Optional — Lining and Zipper
Lining your bag makes it stronger, prevents stretching, and gives it a professional finish.
How to Add Lining (Simple Instructions)
- Lay your bag flat on fabric and trace its shape.
- Cut two fabric pieces slightly larger than the shape.
- Sew along the sides and bottom to create a pouch.
- Slide the pouch inside the crochet bag.
- Hand-stitch or machine-stitch the lining to the top edge.
Adding a Zipper
- Pin the zipper to the lining before inserting it into the bag.
- Sew the zipper to the lining with small stitches.
- Once attached, sew the entire lining into the bag.
Pros of Lining:
- Prevents stretching
- Holds small items better
- Looks clean and professional
Interfacing Tip:
Iron medium-weight interfacing to the lining for more structure.
Troubleshooting & Pro Tips
- Bag feels too stretchy: Use cotton yarn, tighten tension, or add lining.
- Base won’t stay flat: Increase more evenly at both ends of the oval.
- Bag sags when filled: Reinforce the bottom using cardboard wrapped in fabric or plastic canvas.
- Straps stretching too much: Make straps double-layered or use tighter stitches.
- Edges look uneven: Add one final round of slip stitches for a clean finish.
- Shape looks twisted: Place a stitch marker at the start of each round.
Quick Variations
1. Mesh Market Bag
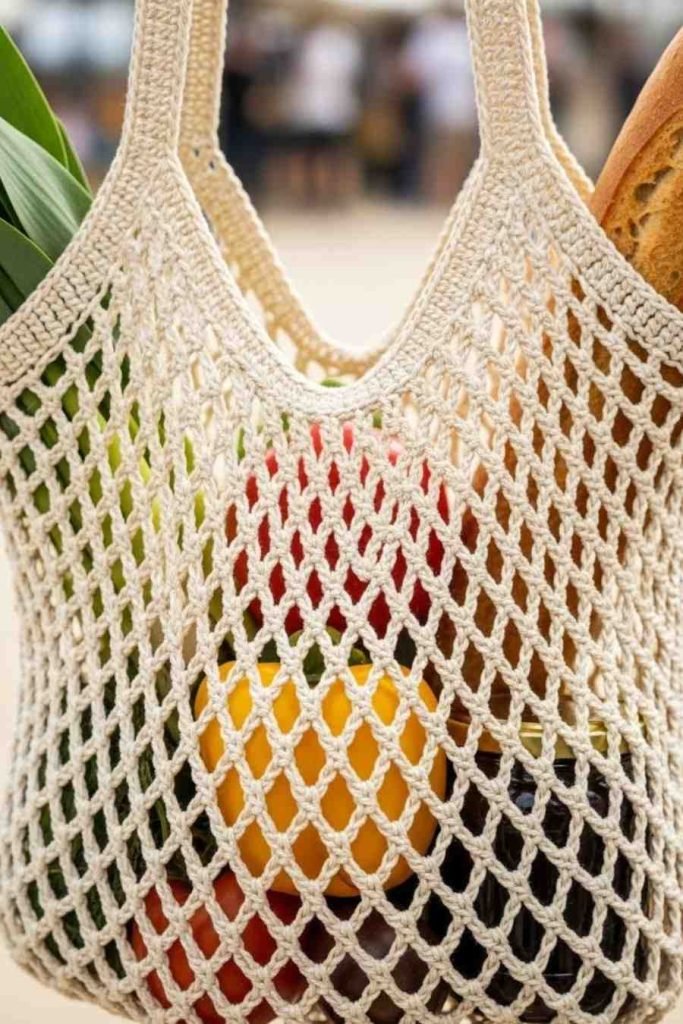
Use chains and double crochet stitches to create a soft, airy mesh texture that works up quickly.
This style is lightweight but surprisingly strong, making it ideal for carrying groceries, beach towels, or everyday essentials. It folds easily into any purse, so you can take it anywhere without adding bulk.
2. Granny Square Pouch
A granny square pouch is one of the easiest small crochet projects you can make. Simply create two matching granny squares in your favorite colors, then crochet or sew them together to form a neat little pocket.
Add a zipper at the top, and you’ll have a cute, sturdy pouch perfect for cards, makeup, or small essentials.
3. Hunky Shoulder Bag
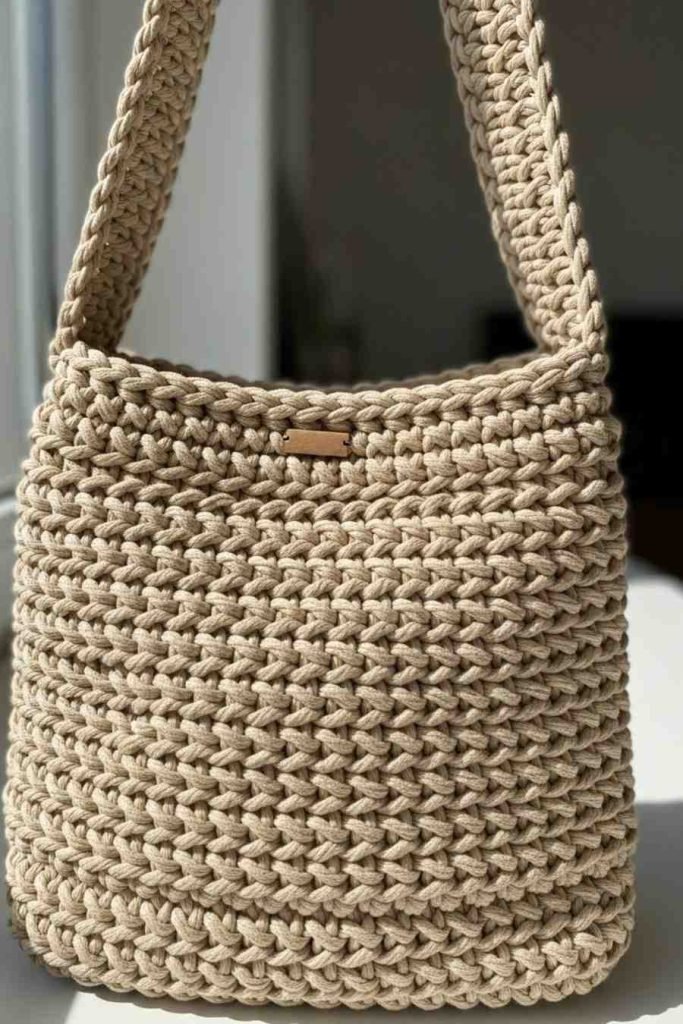
Use thick macramé cord and a large hook to create a bold, sturdy shoulder bag that holds its shape beautifully.
The chunky stitches give it a modern, trendy look that works with almost any outfit. It’s fast to crochet, super durable, and perfect for everyday use.
Conclusion
Making a crochet bag is simple once you understand the basic structure: build the base, create the body, finish the top, and add straps.
You can customize the size, stitches, and colors to match your personal style. Whether you keep it minimal or add lining and hardware, your handmade bag will always feel special because you made it yourself.