If you love applying mehndi, you’ve probably wished for a cone that gives smooth lines, fresh color, and a dark stain. The good news? You can make a perfect mehndi cone right at home.
It’s fresher, cheaper, and gives you full control over the texture and quality. No more guessing what’s inside store-bought cones you’ll make your own blend that actually works.
Let’s walk through everything step-by-step in a simple way.
What You’ll Need
You don’t need any fancy tools to make a perfect mehndi cone. Start with some fresh henna powder and fine sugar, which are the base of your paste.
Add a few drops of essential oil, such as eucalyptus, lavender, or tea tree, to help release the color and give a pleasant aroma. You’ll also need lemon juice or warm water to mix the paste to the right consistency.
For shaping the cone, use a plastic sheet or cellophane, along with scissors and tape to secure it. Finally, keep a small spoon or a piping bag handy to fill the cone easily and neatly.
With just these simple items, you’re ready to create your own mehndi cone at home.
Choosing the Best Henna Powder (Freshness Matters!)
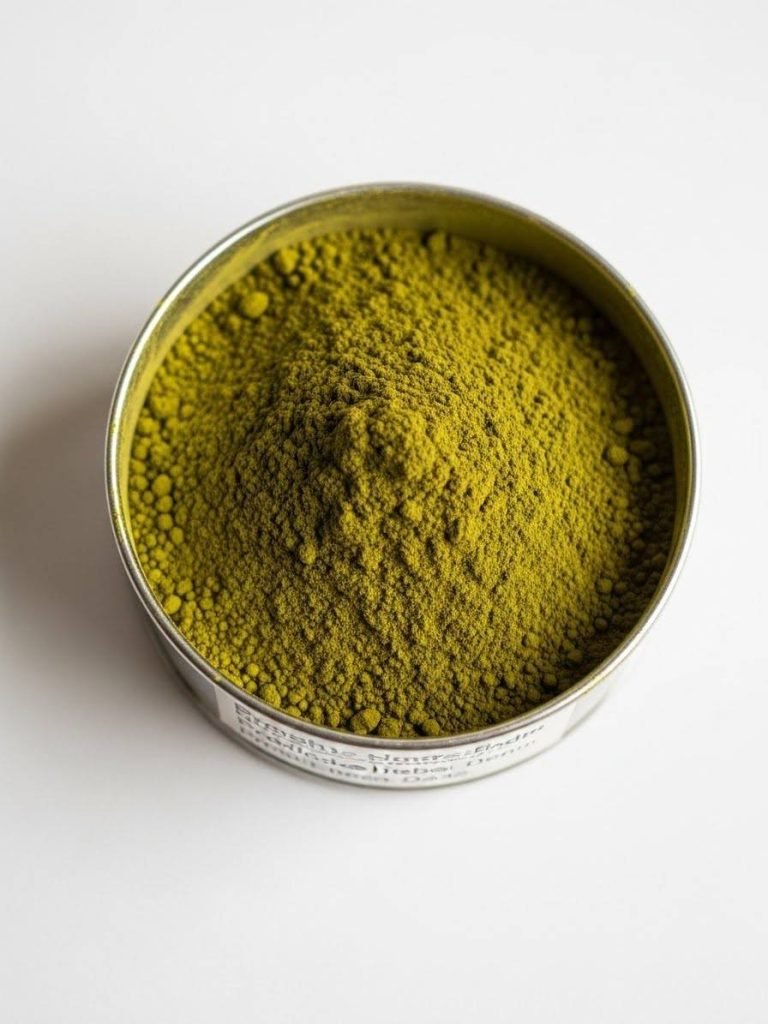
Good mehndi starts with fresh, finely sifted henna powder. When selecting a powder, look for one that has a soft green color, a smooth and fine texture, and a strong natural herbal smell.
It’s also important to check the production date fresher henna produces richer, longer-lasting stains. Avoid reddish-brown or dull-colored powders, as these are usually old or low-quality and may give weak or uneven results.
Using high-quality, fresh henna powder ensures your paste flows smoothly and your mehndi designs come out vibrant and beautiful.lly produce weaker stains. Fresh powders with a fine texture create smoother paste and fewer clogs in the cone.
Simple Mehndi Paste Recipe (Small Batch)
Here’s an easy, reliable recipe for 1–2 cones:
- 25g henna powder
- 1–1.5 teaspoons sugar
- 1.5 teaspoons essential oil
- ¼ cup warm water or lemon juice (add slowly)
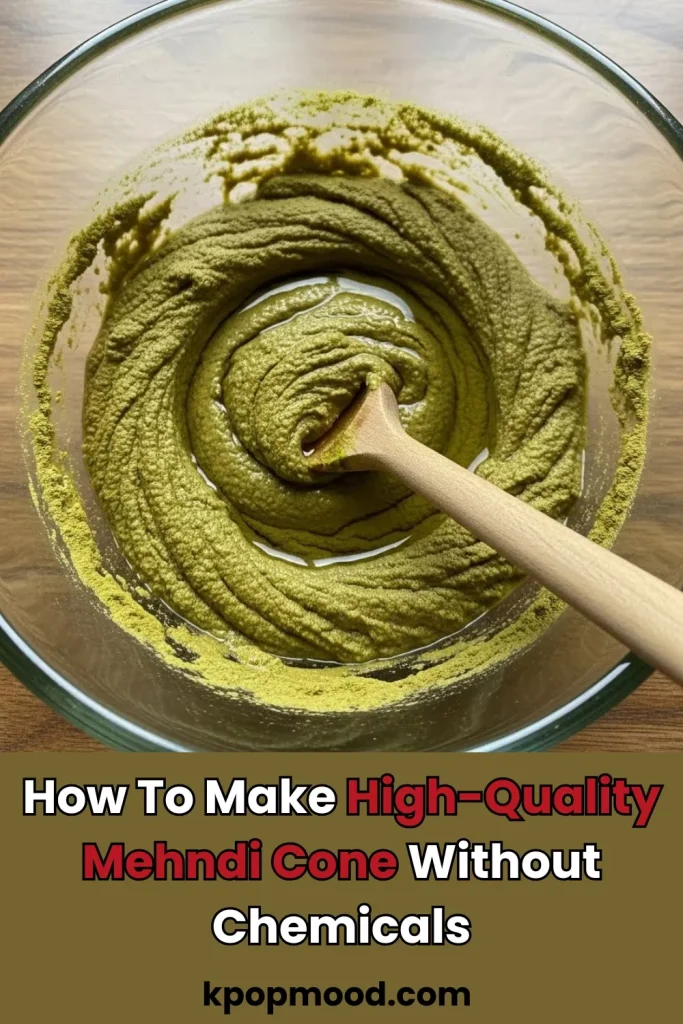
How to Mix the Mehndi Paste

Start by sifting the henna powder into a clean bowl to remove any lumps and ensure a smooth paste. Next, add the sugar and mix the dry ingredients thoroughly. Then, pour in the essential oil and stir well.
Slowly add warm water or lemon juice while continuously mixing until the paste reaches a thick, mashed-potato-like consistency.
Once smooth, cover the bowl and let the paste rest for 6–12 hours to allow the dye to release fully, giving you a rich and long-lasting stain.
How to Roll a Mehndi Cone (Easy Steps)
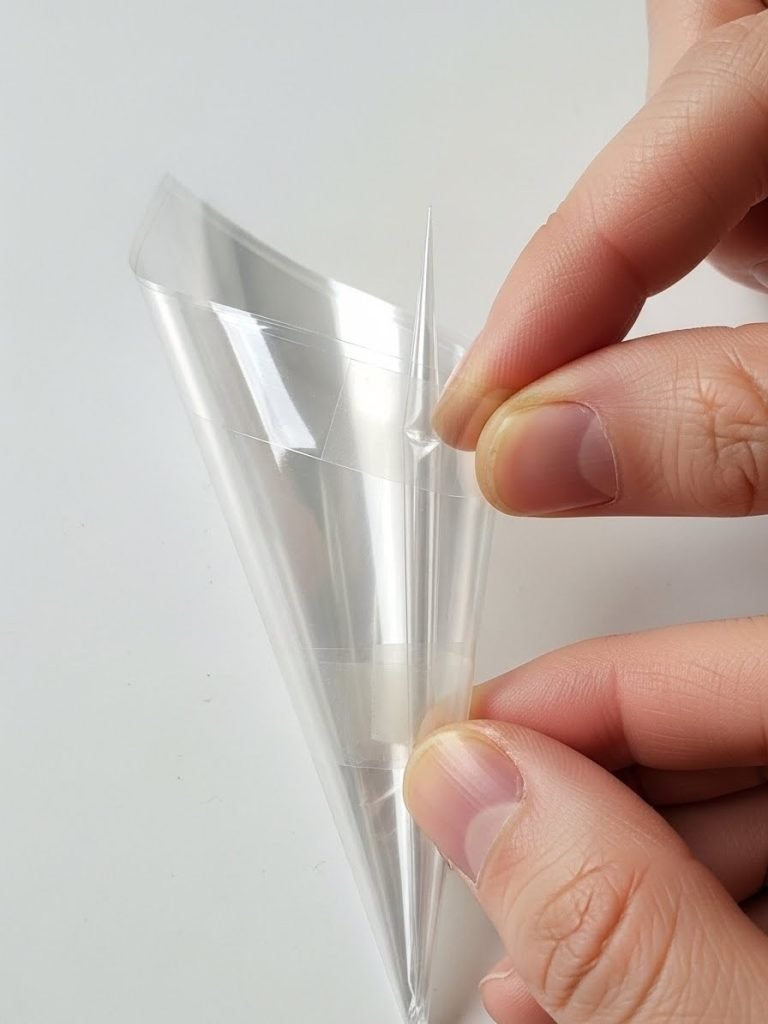
- Cut a triangle of cellophane.
- Hold one corner and roll it tightly into a cone shape.
- Make sure the tip is very sharp and closed at the bottom.
- Adjust the top edges to create a neat opening.
- Tape the side so the cone keeps its shape.
How to Fill & Seal the Cone
- Spoon the mehndi paste into the cone until it’s half full.
- Don’t overfill it becomes hard to control.
- Push the paste down gently so there’s no trapped air.
- Fold the top flap forward and roll it tightly.
- Seal it with tape.
- Snip a tiny bit off the tip once you’re ready to use the cone.
Quick After-Care Tips for a Darker Stain
To achieve the deepest, longest-lasting color, keep the mehndi on for 6–8 hours or even overnight. Gently dab the design with a lemon and sugar mixture to help seal the paste and enhance the stain.
Avoid washing the area with water for at least 12 hours to allow the dye to fully develop. You can also warm your hands lightly over steam for a few seconds to help darken the color.
Remember, the stain will continue to darken naturally, reaching its richest shade within 24–48 hours.
| Problem | Solution |
|---|---|
| Paste too runny | Add a little more henna powder and mix again. |
| Paste too thick | Add a few drops of warm water until smooth. |
| Weak stain | Use fresher henna, keep the mehndi on longer, and avoid washing with soap too soon. |
| Cone clogging | Strain the paste through a fine cloth before filling. |
Safety Tips
- Avoid “black henna” it may contain harmful chemicals.
- Always do a patch test if you have sensitive skin.
- Use only natural essential oils meant for skin use.
Test Your Mehndi Cone Knowledge!
Your Mehndi Expertise Level:
Conclusion
Making your own mehndi cone at home is easier than it looks, and the results are so much better than store-bought cones. You get a fresh paste, a smooth flow, and a dark stain that actually lasts.
Plus, you know exactly what ingredients are going onto your skin. With a few simple steps mixing, rolling, filling, and sealing you can create a perfect cone anytime you want.
If you’re doing bridal mehndi or quick everyday designs, homemade cones give you full control and confidence.